
Tag Archives: Sacramento Makeup Class

Man-icures

Listen up boys, girl’s aren’t the only ones who need a few simple grooming tips!  And I am not just talking hair cuts and the occasional man-scaping.  I am talking about another simple and basic piece of male hygiene, nails.

I like men’s hands, the strength, the roughness, but nothing is worse than cracked cuticles and nails.  For one, not too attractive, for two, ow!

So, here’s a few tips your ladies will thank you for:

Men’s nails grow faster than women’s. Also, they are larger and thicker. So this means a little extra care needs to be taken.  Trimming them regularly, a doing a quick basic manicure, sans nail polish, would be a must.

A simple, easy regimen would consist of cleansing your hands, and if you have time letting them soak to soften the cuticles and skin.  If you don’t have the time to soak, you can move to trimming your nails.

Use a good clipper and take care not to cut too short, nothing is worse than the pain of nails too short.  Which makes me caution about ripping nails off to take off length.  Again, OW!  You can seriously damage your nail bed doing that and potentially cause an infection.

Shape your nails with a emery board (Nail file) to take off those rough edges that can snag and scratch, then apply lotion.

That’s it.  Pretty basic, pretty simple, pretty essential.

Method Makeup Academy, Sacramento’s Makeup School

Primer: To Have or Have Not

Primer is open for debate.  Some people swear you need it, no matter what.  But really, what’s it good for?  Your face?  Your eyes?  Is it really necessary to use a primer for everyone, every day?

Here’s the low down on Primer.  At least as I see it. 

Primer is a silicone based liquid to be used before your foundation and after your lotion.  You don’t need to use it every day.  It’s not absolutely necessary to use for every person or for every occasion, as it’s an extra layer that can take you extra time, not to mention extra buildup on your skin.  Everyday makeup doesn’t have to be as full coverage, or as dramatic as makeup for a night out.

What it’s really good for is dry skin, skin with blemishes or skin with wrinkles and fine lines.  Its purpose is to create a smooth surface on top of your skin, thanks to its primary ingredient, silicone.  It’s supposed to help create a smooth canvas on which to create your master piece. The silicone in it fills in fine lines and pores, smoothing out the blemishes, and decreasing the appearance of dry skin. 

Primer isn’t essential for long wear makeup, so only use if necessary on brides, long photo shoots, or on those days when you need your makeup to last.  It adds an extra layer to that flawless finished look that might cause slippage when combined with body heat and sweat.  So use with discretion.

If you choose to use primer apply over your daily moisturizer.  Apply with a makeup sponge, or if you’re like me, with your fingertips.  You can apply it to your face, in your T-Zone area, where most people experience pores and fine lines.  After it is applied simply apply your foundation, your powder and you will have a smooth palette on which to create the look you desire.

Well ladies, hope this answers the question of whether or not you should use primer.

Primer’s I would recommend:

Mircoperfecting Primer from Makeup Forever

Photo Finish Foundation Primer by Smashbox

the AMAZING Spackle by Laura Geller

And my ALL TIME Favorite the Poreless Primer by ELF Cosmetics (a whopping $10 for their large bottle.) – this option is not only cost effective but works great.  A little bit of this goes a VERY long way.

Method Makeup Academy, Sacramento’s Makeup School
Hot Rollers 101: How to Get Volume

Some of us like to have a little volume in our hair.  Maybe not Texas Pageant, or Jersey Shore (those have run their course) but a little volume can be nice.  Have you been trying to get volume in your hair and it just keeps falling flat?  Have you considered hot rollers?

I know, the term hot rollers immediately brings to mind little old ladies, outdated mothers and BIG hair.  But believe me, they do have their uses.  A good set of hot rollers will give you amazing volume that will last all day.  And even if you aren’t going for big hair, or Victoria Secret bed head, you might want to check them out.

My favorite brand of hot rollers are the Remington T-Studio.  You can find them at Target of all places for under $50 and they will last forever.  I’ve had my set for 10 years!

Whichever brand you choose to invest in, try to find ones that are ceramic covered in velvet.  You also want to make sure that the clamps are lined with Ceramic as well.  This will insure that the ceramic will radiate the heat out, hit the ceramic plates on the clamps holding the rollers and go straight back into the hair guaranteeing a large curl that will last all day with minimal product. 

Hot Roller How To:

  1.  Section out your bangs and/or the front portion of your hair around your face.  If you don’t you’re going to look a little crazy.
  2. Second take a section at the front of your head, just behind where you have sectioned out your bangs, at the top of your head maybe 1-1 ½ inches wide.  Pull it straight up and comb out any tangles.  You may at this time choose to add a touch of hair spray to the backside of the section, but only if you want to lock in a curl that will stay very TIGHT.  If you are just going for volume skip the hair spray.
  3. Take your first hot roller, be careful not to burn your fingertips as these bad boys get really, REALLY hot.  Slide the curler up from the base of the section of hair from the backside.  This will help smooth any flyaway hairs up into the section.  Once the roller reaches the top of the section, roll it backwards away from your face.  Roll it down until it is sitting on the top of your head vertically.  Do not let it slump towards the back as this will not give you good lift and volume. Apply the clamp.
  4. Work your way back along your crown, repeating this step.

NOTE: If you just desire the top of your head to have volume and don’t want to have big Victoria Secret curls (this isn’t the 2000’s!), just do the crown of your head.  What you want to have is a Mohawk of hot rollers down the very center of your head.  This is going to give you amazing volume to your hair.

  • Once you have rolled the last of the hair in your “Mohawk” let them sit until they are cool to the touch.  Remove them and run your fingers through them.
  • Once removed your hair will have amazing volume along your crown, you can add a little back combing if you want and just style however you like.

And that is Hot Rollers 101!

Method Makeup Academy, Sacramento’s Makeup School
Getting the proper color match

We’ve all done it.  We’ve stood in the cosmetics department of Rite Aid, Walmart, Target, even MAC and Estee Lauder and searched for that right color of foundation.  We’ve even asked for help and still we’ve gotten home to find it’s just not right.

So frustrating, so annoying and so damn expensive!

What is a girl to do? Well, first off, trying to match ourselves in florescent lighting at a Walmart is never easy.  And second most of us are matching the wrong part of our body!

At makeup counters you tend to test foundation colors on your hand.  Big mistake.  Your hands tend to get more exposure to the sun and to the elements than our faces do.  So they are not the same color as our face, or our neck or our décolletage.  So how on earth would the color that matches the back of your hand match your face?  But it’s not like we were ever taught how to really get the right match, right? RIGHT????  So, then we do the time tested holding it up to our cheek test only to get home and find we have become a floating head.  God I hate floating heads!  Or worse we find that nasty line of demarcation.  That thing will kill the best makeup in a heartbeat.

So the answer?

The best place to match your skin is your collarbone, first because your face, chest and neck all tend to be a little bit different from each other.  2nd you won’t be comparing color to sun damage that can develop on your chest.  So if you are matching your collarbone and blending your foundation nicely from your hair line, down your neck and feathering to a finish at your collar bone you will end up, most of the time, with perfectly matched foundation.

One more bit of foundation advice:  The color you use in the winter is not going to be the color you use in the summer, so don’t feel bad about having two colors on hand.  You can use the two either by themselves or by combining them to create your own custom color match, no matter what time of the year it is.

Well I hope this helps.  Have fun out there shopping.

Method Makeup Academy, Sacramento’s Makeup School
Rockin’ Red lips

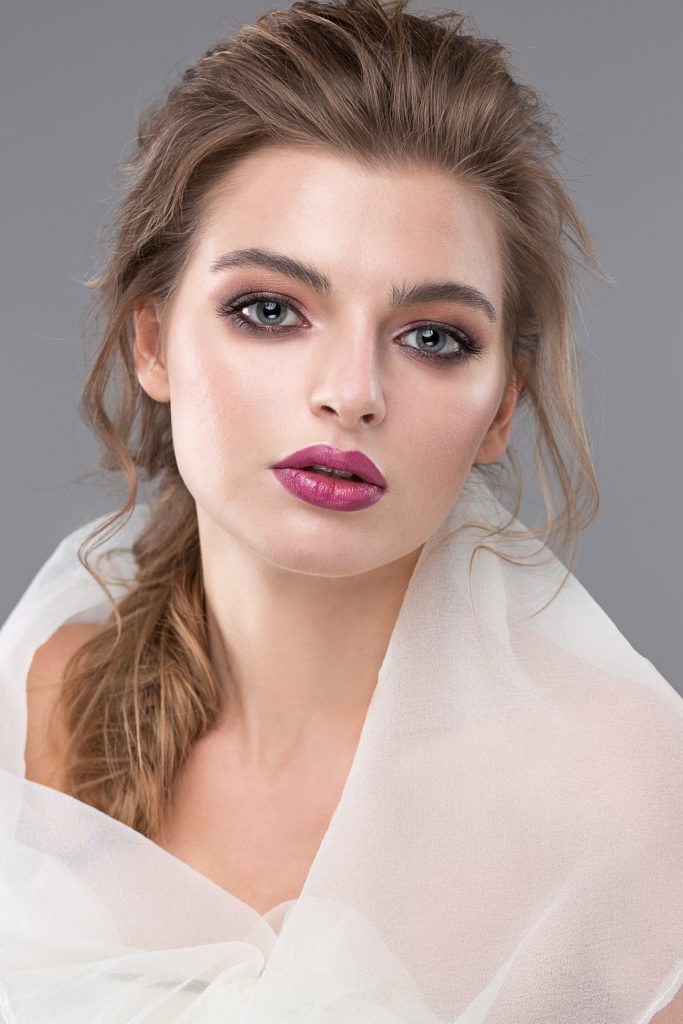
Hollywood has been rockin’ the red lip and you’ve been dying to follow suit.  But the question remains, how can you rock a hot red mouth and not look like you are crazy made up? 

What about the rules of playing up your eyes and down playing your mouth or vice versa?  Is it true or do you have to do a nude eye with a red mouth?  Your skin is fair, will going red make you look too pale or like a Goth or vamp?  Do you have to do the whole Marilyn Monroe look or Betty Paige?

Well, here’s a few tips to keep you out of the mine field of makeup mistakes and answer a few of those questions.

Generally you will want to play up one feature.  This means if you are doing crazy dramatic eyes you might want to tone down your lips so that your features aren’t at war with each other.

If your lips are very narrow, thin or very small, you might want to avoid the red.  Red is a bold, strong color, it can make thinner lips appear narrow, thus giving your mouth a harder, older look.  For thin lips I would pull out a softer color that will make them look fuller and softer and much more kissable.

Fair skin can rock a red lip, think porcelain doll.  Use a light blush and you will avoid any gothic appearance.

Choose a true red, with a slight cool/bluish undertone, this will be bold and keep your teeth from appearing any color they should not.

For your eyes, you don’t have to opt for the heavy liner of a pin-up or Marilyn, you can do a soft eye, with mascara’d lashes and a soft contour in the crease, or you can be a little more bold and smoke out the liner and lid for a very dramatic evening look. 

Of course the classic Hollywood Glam look is never a bad choice.  You can achieve this with a soft cream on your lid and brow bone, light brown or taupe just in the crease and a dark winged liner.  Heavy mascara and a little liner on the lower lid will give you a fabulous look and help you rock those red lips!

Method Makeup Academy, Sacramento’s Makeup School

Fake Bake or the Real Deal

It’s very tempting this time of year to head out to the tanning salon or even lay out on those more sunny days to pick up some sun. But it’s not really the safest way to get that luscious golden glow. I’m not just talking about skin cancer, though too much sun exposure can definitely lead to that. What I’m talking about are wrinkles, yep, those dastardly signs of aging that we all could do without.

So what are you supposed to do? Well for one, don’t tan your face and neck when in those hot boxes or under that golden orb. And if you really insist on baking your skin, stay hydrated. Dehydration is the number one creator of fine lines and wrinkles in skin. It’s amazing what a difference a few ounces of water can do for your skin. Use a good moisturizer, hydrate and don’t leave your house without your sun screen.  Even with tanning a sun screen should be used to cut down on the damage done by direct sunlight.

So with all these side effects, wrinkles, dehydration, pre- mature aging and cancer why would anyone still want to tan the old fashioned way or in a tanning bed? Because we all want to be golden, that’s why!

My remedy for this? Airbrush spray tanning of course! The results are immediate, so there’s no need to plan in advance of your summer vacation or a night out in that little black dress that shows about a yard of leg.

Take fifteen minutes out of your day to have a golden tan that lasts a week. The perfect start to your summer tanning or the safest way to keep bronzed and avoid all the hazards of sun exposure. Not to mention, no tan lines, no orange streaks or ‘fake bake’ look, get a perfect sculpted tan every time.

And one more added benefit, the ingredients in this tanning solution, DHA and Aloe benefit the skin more than you might think. Aloe adds conditioning, moisturizing to your skin while the DHA has actually been known to help reduce the signs of cellulite! Yep, I said it, cellulite. So what are you waiting for? It’s time to get your own golden glow!

Method Makeup Academy, Sacramento’s Makeup School

Smooth Shave

Tired of stubble on your legs or underarms?  Not sure how to get it smooth, yet not really willing to go in for the cost and pain of waxing?  Have you tried the chemical solution only to find you get a nasty rash?

Yeah, me too!  And I hate it!

So, after doing some research and some experimenting this is what I have learned.

Multiple directions.  That’s right, that is all it takes.  You will get the smoothest shave ever by using a new razor, good lather and multiple directions.

Most of us just shave our legs in one direction.  Up from the ankle to the knee, etc, or of course there are those who go with the grain.  But one direction isn’t going to cut it because most of the time our hair doesn’t grow in a nice tidy way.

Hair grows in different directions on different parts of our skin.  It can grow up, down, side to side, you name it.  So the best way to get a nice, smooth shave is to go at it from different directions.  This will leave nothing to chance and guarantee you get all of those pesky hairs at one go.

Well, there’s my two cents, so happy shaving out there.

Method Makeup Academy, Sacramento’s Makeup School

Open Up Those Eyes

The question any lady with smaller eyes has is how to make them look larger, more open.  Well, the answer is finally here:

1.  Raise your eyebrow.  This means if at all possible have your eyebrow shaped to leave more lid space.  You can even achieve this by drawing your eyebrow on up higher to give the illusion of a larger lid.

2.  Be sure to use white or nude liner on your lower water line, which will create an open, wide eyed look.  If you want to add some drama you can take a very soft powder liner just under the lashes to give dimension without closing them off.

3.  Use several different depths of color.  What this means is if you are choosing to use brown, don’t just use one shade.  Use a few, blending them together to add depth and dimension to your eyes.

4.  Wing ’em out!  Blend your crease and even your liner out a little, drawing the eyes out to give them some more width and the illusion of size.

5.  Create a false crease.  Using a dark shade of color, you can use shadow to create a false crease, bringing it higher or lower to give the illusion of height to your eyes.

We hope these simple tips will help you open up your eyes and let the world see the beautiful you.

Method Makeup Academy, Sacramento’s Makeup School

Primer: To Have or Have Not

Primer is open for debate.  Some people swear you need it, no matter what.  But really, what’s it good for?  Your face?  Your eyes?  Is it really necessary to use a primer for everyone, every day?

Here’s the low down on Primer.  At least as I see it!  Primer is a silicone based liquid to be used before your foundation and after your lotion.  You don’t need to use it every day.  And it’s not absolutely necessary to use for every person or for every occasion.

What it’s really good for is dry skin, skin with blemishes or skin with wrinkles and fine lines.  Its purpose combined with its predominate ingredient, silicone, is to create a smooth surface on top of your skin.  Its supposed to help create a smooth canvas on which to create your master piece.

The silicone in it fills in fine lines and pores, smoothing out the blemishes, and decreasing the appearance of dry skin.  It will also add length of wear to your overall makeup.

Primer isn’t essential for long wear makeup, so only use if necessary on brides, long photo shoots, or on those days when you need your makeup to last.  It adds an extra layer to that flawless finished look that might cause slippage when combined with body heat and sweat.  So use with discretion.

It’s not necessary for everyone, or for every look, as it’s an extra layer that can take you extra time, not to mention extra buildup on your skin.  Everyday makeup doesn’t have to be as full coverage, or as dramatic as makeup for a night out.

If you choose to use primer apply over your daily moisturizer.  Apply with a makeup sponge, or if you’re like me, with your fingertips.  You can apply it to your entire face, eyelids and lips included.  (May not taste too great but it will make your lips smoother.)  Then simply apply your foundation, your powder and you will have a smooth palette on which to create the look you desire.

Well ladies, hope this answers the question of whether or not you should use primer.

Primer’s I would recommend:

Mircoperfecting Primer from Makeup Forever

Photo Finish Foundation Primer by Smashbox

the AMAZING Spackle by Laura Geller

And my All Time Favorite the Poreless Primer by ELF Cosmetics (a whopping $10 for their large bottle.) – this option is not only cost effective but works great.  A little bit of this goes a VERY long way.

Method Makeup Academy, Sacramento’s Makeup School
Pedicure precautions

Who doesn’t love a pedicure!  The foot massage, the hot water and if you’re lucky the massage chair.  Not to mention the bright, fun colors that make your toes look so pretty.

Pedicures are great, but there are a few precautions every woman should take.

Pedicure basins are breeding grounds for bacteria and disease, countless feet are placed in them, with who knows what fungi attached.  Just the sheer possibilities of what could be swimming in that warm water can be terrifying.

But do not despair, follow these simple precautions and you will save your feet and yourself from some nasty bacteria.

1.  Be the first appointment.  That’s right, schedule your appointments so that you are the first customer to sit in that chair.  By state law each salon should run disinfectant through each chair for 8 hours each night.  Each basin should have been thoroughly sanitized.  So being the first client means no bacteria should be lingering to infest your feet.

2.  Don’t shave your legs that morning.  I know none of you want to show up to your pedicure with hairy legs, and I am not suggesting that you do.  But freshly shaved legs have open pores, not to mention any razor nicks that might have occurred.  These are just open and waiting for any potential bacteria to get inside.  So be a good girl and shave the night before.

3.  Pay attention.  Look around you when you enter the salon.  Are they disinfecting the basins after each of their clients?  How clean and sanitary is the bathroom or the stations?  These will be indicators on if they follow proper sanitation procedures for their pedicure stations.

Well I hope these three simple steps will keep you all safe and sound.  Now get out there and enjoy being pampered!

Method Makeup Academy, Sacramento’s Makeup School