 You ever know that one person who apparently knows all the answers even when you don’t want them to be right? Yeah, that person for me is my little sister. She’s always freaking right!!! Ok, don’t get me wrong, I love and adore her, and she’s right about the best things, but damn it, she’s my baby sister! She’s not supposed to tell me what to do! I’m supposed to tell her what to do! But, once again she is right!
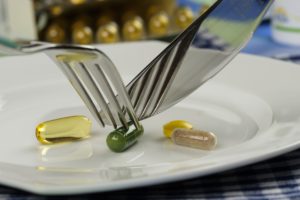
Ok, so I have always been borderline anemic, but it got a lot worse when I went vegetarian eleven years ago. Then in 2012 I started donating platelets every two weeks with the occasional whole blood donation throughout. Because of this my iron levels were always in jeopardy. Seems like whenever I ate, it was a quest to find enough protein and iron. I was doing pretty good to, or so I thought, with supplements.
When you don’t have enough iron in your blood you’ll find you have some really annoying side effects, not the least of which is lethargy and exhaustion. You can also experience shortness of breath, dizziness, irritability and unexpected weigh loss (though I highly doubt we’d complain about the weight loss!). Iron is not made in your body; you have to get it through what you eat. So if you aren’t eating iron rich foods your in big trouble! You need iron for Proper immune function and it’s and essential element for blood production, especially hemoglobin which gets the oxygen from your lungs through your body.
I had this whole routine to keep my iron high enough so I could donate and still be healthy. I took 1-2 iron supplements a day, plus calcium, vitamin C, a multi and a bunch of other vitamins. This combined with my quest for protein seemed to do pretty good. Well, that was until I had a talk with lil’ sis. She said that I should switch over to a cast iron skillet. She said with that alone I would get all the iron I need and not have to struggle so much trying to keep my iron up.
I poo, poo’d her suggestion, not believing something that simple would actually do anything. Besides, cast iron skillets are hard to use, everything sticks, they get really hot so you burn yourself and they are EXPENSIVE!!! But she just shook her head and said, you really should. So I decided what they hell and decided to keep an eye open for a cast iron skillet next time I went to Goodwill. Hopefully I would find one there without spending too much. I love thrifting so it would be a win-win.
Well, I found one. Rather I found a set of 4 really awesome cast iron skillets. Right about the time I went in for a round of Platelet donations. At that appointment I barely squeezed by at a 13.2 iron level when the minimum is 12.6 and this is with taking iron supplements every day. I started cooking with the skillets. Yes, it was a little bit of a chore getting used to how they worked, but all in all I began to really like them. Two weeks passed, I ran out of iron supplement pills somewhere right at the beginning so I didn’t have iron pills for quite some time before my bi-monthly platelet appointment arrived. I was very worried that I wouldn’t have high enough iron since I was in the middle of my monthly ‘visit’ which does drop your iron reserves.
You could have knocked me over with a feather when my count came back as 14.2!! 14.2 when I hadn’t been taking anything? Could Abi be right? I verified by checking out a few sites and I’ll be damned but she was right. According to UC Davis medical, using Cast Iron Skillets to cook with can add 80 percent MORE iron to your diet. 80 percent!!! I know, I was blown away. But I had to give my sis her props. She was right and yes she smiled a very ‘I told you so’ smile. But she had a right to. So if you’re struggling to keep your iron levels high, do what I did (without being told by your little sister!) buy a cast iron skillet at Goodwill. You’ll be surprised.
Some foods rich in iron include:
Meat and Poultry
- Lean beef
- Veal
- Pork
- Lamb
- Chicken
- Turkey
- Liver (except fish liver)
Seafood
Vegetables
- Greens, all kinds
- Tofu
- Broccoli
- Sweet Peas
- Brussel Sprouts
- Kale
- Bean Sprouts
- Tomatoes
- Lima Beans
- Potatoes
- Green Beans
- Corn
- Beets
- Cabbage
Some Useful Links:
http://www.ucsfhealth.org/education/hemoglobin_and_functions_of_iron/
http://www.nytimes.com/health/guides/nutrition/iron-in-diet/overview.html
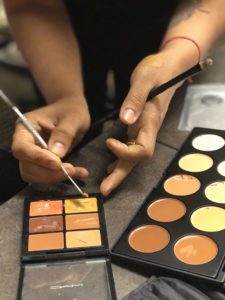
Method Makeup Academy, Sacramento’s Makeup School

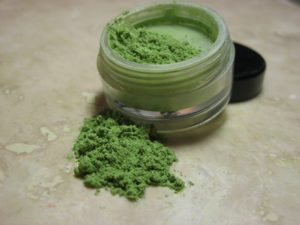 How many times have you dropped an eye shadow, powder or blush only to watch it shatter into a thousand pieces? And what’s the next step, you throw it away and sweep up the mess right?
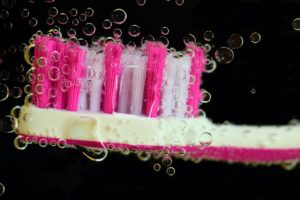
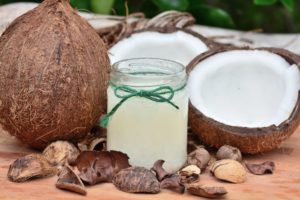 I’m sure by now you’ve heard about Oil Pulling. If not, give it some time you will. I had heard about it, but didn’t pay any attention until my sister Abi brought it up. Abi is a massage therapist and a professed Dr Oz addict. She is very knowledgeable about health and healthy living. (Maybe I should clarify a little more. Even though she loves Dr Oz she verifies what he says on his show by doing research from other sources before making any changes to diet, lifestyle etc.) Now, because of this when she suggests something I usually listen to her, baby sister and all, because I know she has done her homework.

 White Teeth Tips
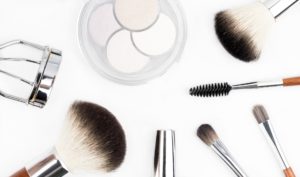
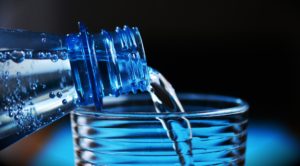 One of the main contributors to healthy winter skin is proper hydration. Not just in what goes onto the skin, but also what goes inside.