All posts by Leah2017

Hot Rollers 102: Sexy Bed Head

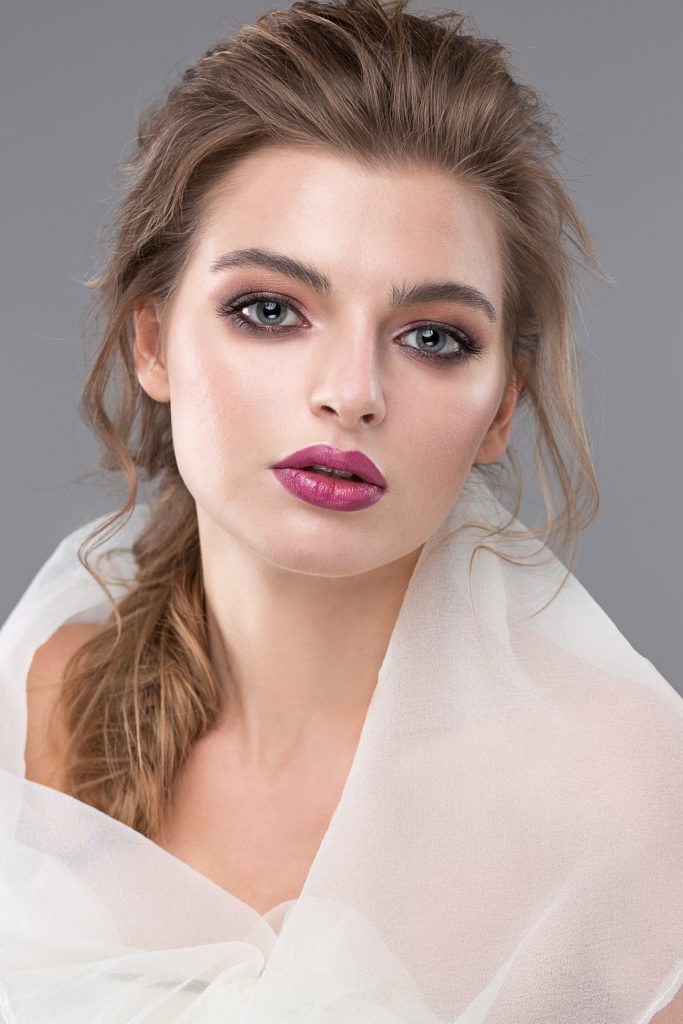
Ok, so the other day I taught you how to use Hot Rollers to get volume along your crown.  Now here’s how to get that sexy Victoria Secret Bed head!

Section out your bangs, you don’t want them to get curled back into the rest of your hair.  You can always curl and style them at the end.

Now, section your hair into three parts, the center from just behind your bangs, straight back to the base of your neck and then each side above the ear.

Now, using your hot rollers create a Mohawk down the center of your head.  This is going to give you volume and amazing curls.  Make sure you to the curlers straight up and not just around the crown.  You want a Mohawk otherwise say good bye to volume.

Now, on the sides you are going to want to section out the hair just in front of your ears.  This you are going to want to leave out of the hot rollers unless you want Farah Fawcett hair.  Just sayin’ might not be your goal right now.

Once you have the hair section out, you’re going to do hot rollers at an angle back towards the back of your head.  You don’t want to roll straight down or straight back.  You want a slanted angle on the sides of your head.

Now that all three sections of your hair are rolled, light spray with hair spray, let sit until cool to the touch then you can remove.

If you want to keep the curls and not just have volume, unroll them with a spiraling motion, this will preserve the curl.  If not just pull out and run your fingers through.

If keeping the curl, spiral out until all hot rollers are removed, lightly spritzing each spiral curl with a working hair spray or styling spray.  My recommendation is using Enjoy Hair Care’s Styling Spray.  It will give control without making each curl too stiff.  Once your whole head is unrolled you can flip your head over and do that wonderful head shake.

This will loosen up the curls without making them all drop out.  Flip your head back up, use a curling iron to finish up your bangs and the sectioned off hair around your face.  You can add some light back combing at the back of your crown to help maintain the volume, then spray with a good hair spray.

There you go, hot sexy Victoria Secret Bed Head!

Method Makeup Academy, Sacramento’s Makeup School

Latest Mascara Find!

Recently I found mascara that blows the competition out of the water.  It doesn’t get the hype that other mascaras you see plastered all over the internet, magazines and TV screen.  But this little gem is so worth finding.

I’ve always liked Maybelline Mascara, its good quality and hey, it’s the first one that ever hit the market back in 1915 when T.L. Williams combined Vaseline and coal dust to create the first manufactured lash darkener and named it after his sister Maybelle who was his first customer and inspiration.

Well recently I discovered Maybelline’s Volum’ Express line (it’s been out a while, but you tend to stay with a single brand until something falls in your lap), and one in particular:

The Falsies in Black Drama.  It’s amazing!  Two coats and you get thick, long, luscious lashes, with no clumping, none of that spidery look and even after a 12 hour day you’re not going to have much flaking under your eyes. Definitely a long lasting, all day wear mascara that you’re going to love!

Here’s why Maybelline says you’ll love it and I agree:

Why you’ll Love It

The most dramatic false lash fab volume!
• Patented Spoon brush reaches lashes from corner-to-corner, while Black Drama formula fills in every gap.
• Matte black lashes from corner-to-corner.
• No gaps from any angle.
• Contact lens safe and Ophthalmologist tested.
• Washable; also available in waterproof formula. 

So if you’re looking for a new mascara that you’ll love try Maybelline’s The Falsies in Black Drama.  It’s just a small investment of $12.18 at Wal-Mart and more than worth a try.

Method Makeup Academy, Sacramento’s Makeup School

Getting a Summer Tan

We’ve had one heck of a weird summer!  We’ve got hot weather where is should be cold, we’ve got cold weather when it should be hot.  We’ve got rain instead of shine and now we’re sweltering in over 100 degree weather! It’s wreaking some serious havoc on our summer tanning!

Personally I can’t tan to save my life, however, for those of you who can hold a lovely golden tan, this tumultuous weather can be very discouraging.  The sun hasn’t been out in a steady fashion, so you’re pale and beginning to consider if you should go Goth or not.  Well, before you decide something that drastic, here are a few tips that may brighten up your day.

Tanning Beds.  Ok, if your budget doesn’t allow, or you’re afraid of developing wrinkles, this may not be the option for you, but it’s still a good and valid choice over pale skin.  For one it helps your body produce Vitamin D, which is a great mood enhancer and something your body craves.  However!  This is important; you do not need to expose your body to long periods in a Tanning Bed.  It’s the same as lying out in the sun and you risk more than just getting sunburned.  You do not need to risk a melanoma just to get a little color.  So fifteen minutes max a few times a week will boost your Vitamin D levels and get a little golden going.

Fake Tanner.  So, if you don’t want to risk any form of skin damage that you might encounter with the tanning bed, you can always go the way of the fake tanner.  Now I know some of you are screaming NO!  I understand you have grave misgivings about using anything that comes in a squeeze bottle and boasts an even golden tan.  You’ve seen or experienced all the orange, streaky skin you care to.  Well, I have a product that is amazing and if you apply it properly you will not have to worry about either of those.  It’s called Vichy Self-Tanning Cream.  This stuff is amazing!  Made in France you can find it online at Amazon and other places, but I don’t think you’ll be able to find it at your local Rite Aid.  This stuff gives you an amazing streak free tan with none of that annoying orange shade you so fear.  It’s a healthy and beautiful way to get a summer sun kissed look.

Spray Tanning.  This third option can be a very nice, if somewhat pricey choice.  In average a spray tan can be anywhere from $25 to $50 a go.  Good news is it will last a good week.  Sometimes longer if you happen to have dry skin.  There is one disclaimer I will say though.  Do NOT go to the tanning booths.  These sprays on tans are not even and leave strange little places that are as white as you don’t want to be.  So, find yourself a personalized custom spray tanner.  These will give you a smooth, even and beautiful tan.  You might even be able to get them to do a little creative contouring!

So, hopefully these tips have helped you on your quest for a beautiful beachy tan.

Method Makeup Academy, Sacramento’s Makeup School

Summer is Hair

Summer is hell on hair. I’m sure you’ve heard and know that the heat can frizz out any good head of hair, that chlorine can turn bleached blonde hair green, but do you realize that the heat, the sun and everything else makes your color fade as well?

Like most women, I am sure you play with color throughout the year and summer is no exception. Whether it’s a few highlights, or like me a new vibrant color every other month you still have to deal with fading and the other ravages of summer. None of us want to spend the entire summer hiding from the sun and heat just to make a color job last. For one it’s impractical and for two, it’s just no fun!

So, you might ask, just what are we supposed to do about it? Fear not my fabulous friends! I am about to pass on a few hair care tips that will save your hair AND your budget.

1. Don’t wash your hair every day. I know, I know, sounds pretty impossible, especially to those of you currently yelling, “My hair will get oily!” I know this, but here’s the simple truth, you’re over washing your hair people! Try spreading it out to every other day, longer if you can last without plotting my destruction.

2. Stop using Pantene! And Herbal Essences and Suave and….Hopefully you get the picture. Sure they all smell really great, but they are hell on your hair. Stop the madness people! Love your hair and it will love you. Give it what you need. Do some research and find yourself a Sulfate Free shampoo and conditioner that will save your luscious locks.

3. Use a Heat Protectant. If you are using heat to style your hair, Blow Dryer, Flat iron, Curling iron, you need to use a hair protectant. And not just any, some of these so called heat protectants or shine serums actually contain isopropyl alcohol which dries the hair and splits the cuticle wide open causing even more damage than heat alone. My suggestion: It’s a 10 Shine Spray. I love this little blue bottle; it’s an addiction I know is good for me.

4. Indulge yourself. No, not just on those fabulous shoes you saw the other day at the mall (though I do encourage that too) I mean treat your hair to a deep conditioning treatment. Give it what it’s craving, protein and moisture. You won’t regret it. Some Virgin Coconut Oil lightly worked through your hair, braided and left overnight will nourish, strengthen, hydrate AND cause increased hair growth.

So, now that you’re armed with these jewels of wisdom, head out there and have a great summer!

Method Makeup Academy, Sacramento’s Makeup School

Questions you should ask you MUA

Looking for the right makeup artist for your wedding day or special event can be a little bit of a challenge.  So many people out there claim they are a makeup artist just because they have an abundance of MAC makeup, have done their sister’s makeup for her prom,  ‘everyone asks me to do their makeup’ or have slapped MUA to their Instagram page.  This does not a makeup artist make!

If that were true then I would be an astronaut! I have a bunch of pictures of the universe and I know what NASA stands for.  But I am not an astronaut; it takes a little more than that to truly be something.

A true makeup artist is dedicated to it, they are always honing their skills, always out there learning more and always staying on the top of the latest trends.

So to help you find the right artist for you, here are a few questions you should ask:

How long have you been doing makeup professionally?  Someone can say they have been doing makeup for years.  So adding the professionally part to the question will really narrow it down.  Professionally means more than their mom, sister and best friend have had them do their makeup.

Do you have a portfolio?  A good artist is always adding to their portfolio and they will have no hesitation in showing you what they have done.  You need to look for variety in their work, as well as how dated or updated their work is.  If their portfolio is all high fashion, they may not be the artist to do your wedding day.  A good portfolio should have a good mix, showing variety, creativity and flexibility.

Do you have experience doing Bridal Makeup/Ethnic Makeup/Fantasy Makeup (Whatever specific look you are going for)?  Not every makeup artist specializes in Bridal or Fantasy or ethnic makeup, etc.   Find out if they can.  Each artist has their own personal style, their own specialty, so find the artist who has the one you’re looking for.

What is your makeup experience? (Where were they trained, what do they predominately do and how often do they actually do makeup?)  Professional education is a nice bonus for any makeup artist to have under their belt.  For one it shows they have been legitimately trained and it proves that they are really seriously devoted to their craft.  Also asking what they predominately do makeup-wise will tell you if they are the right match for you and your event.  Finding out if they are a weekend makeup artist or do it as their day job tells you how much experience and practice they get.  All of these are good questions and should be asked.

Well ladies, we hope these questions will help you find the right artist for you and your special day.

Method Makeup Academy, Sacramento’s Makeup School

Man-icures

Listen up boys, girl’s aren’t the only ones who need a few simple grooming tips!  And I am not just talking hair cuts and the occasional man-scaping.  I am talking about another simple and basic piece of male hygiene, nails.

I like men’s hands, the strength, the roughness, but nothing is worse than cracked cuticles and nails.  For one, not too attractive, for two, ow!

So, here’s a few tips your ladies will thank you for:

Men’s nails grow faster than women’s. Also, they are larger and thicker. So this means a little extra care needs to be taken.  Trimming them regularly, a doing a quick basic manicure, sans nail polish, would be a must.

A simple, easy regimen would consist of cleansing your hands, and if you have time letting them soak to soften the cuticles and skin.  If you don’t have the time to soak, you can move to trimming your nails.

Use a good clipper and take care not to cut too short, nothing is worse than the pain of nails too short.  Which makes me caution about ripping nails off to take off length.  Again, OW!  You can seriously damage your nail bed doing that and potentially cause an infection.

Shape your nails with a emery board (Nail file) to take off those rough edges that can snag and scratch, then apply lotion.

That’s it.  Pretty basic, pretty simple, pretty essential.

Method Makeup Academy, Sacramento’s Makeup School

Primer: To Have or Have Not

Primer is open for debate.  Some people swear you need it, no matter what.  But really, what’s it good for?  Your face?  Your eyes?  Is it really necessary to use a primer for everyone, every day?

Here’s the low down on Primer.  At least as I see it. 

Primer is a silicone based liquid to be used before your foundation and after your lotion.  You don’t need to use it every day.  It’s not absolutely necessary to use for every person or for every occasion, as it’s an extra layer that can take you extra time, not to mention extra buildup on your skin.  Everyday makeup doesn’t have to be as full coverage, or as dramatic as makeup for a night out.

What it’s really good for is dry skin, skin with blemishes or skin with wrinkles and fine lines.  Its purpose is to create a smooth surface on top of your skin, thanks to its primary ingredient, silicone.  It’s supposed to help create a smooth canvas on which to create your master piece. The silicone in it fills in fine lines and pores, smoothing out the blemishes, and decreasing the appearance of dry skin. 

Primer isn’t essential for long wear makeup, so only use if necessary on brides, long photo shoots, or on those days when you need your makeup to last.  It adds an extra layer to that flawless finished look that might cause slippage when combined with body heat and sweat.  So use with discretion.

If you choose to use primer apply over your daily moisturizer.  Apply with a makeup sponge, or if you’re like me, with your fingertips.  You can apply it to your face, in your T-Zone area, where most people experience pores and fine lines.  After it is applied simply apply your foundation, your powder and you will have a smooth palette on which to create the look you desire.

Well ladies, hope this answers the question of whether or not you should use primer.

Primer’s I would recommend:

Mircoperfecting Primer from Makeup Forever

Photo Finish Foundation Primer by Smashbox

the AMAZING Spackle by Laura Geller

And my ALL TIME Favorite the Poreless Primer by ELF Cosmetics (a whopping $10 for their large bottle.) – this option is not only cost effective but works great.  A little bit of this goes a VERY long way.

Method Makeup Academy, Sacramento’s Makeup School

Hot Rollers 101: How to Get Volume

Some of us like to have a little volume in our hair.  Maybe not Texas Pageant, or Jersey Shore (those have run their course) but a little volume can be nice.  Have you been trying to get volume in your hair and it just keeps falling flat?  Have you considered hot rollers?

I know, the term hot rollers immediately brings to mind little old ladies, outdated mothers and BIG hair.  But believe me, they do have their uses.  A good set of hot rollers will give you amazing volume that will last all day.  And even if you aren’t going for big hair, or Victoria Secret bed head, you might want to check them out.

My favorite brand of hot rollers are the Remington T-Studio.  You can find them at Target of all places for under $50 and they will last forever.  I’ve had my set for 10 years!

Whichever brand you choose to invest in, try to find ones that are ceramic covered in velvet.  You also want to make sure that the clamps are lined with Ceramic as well.  This will insure that the ceramic will radiate the heat out, hit the ceramic plates on the clamps holding the rollers and go straight back into the hair guaranteeing a large curl that will last all day with minimal product. 

Hot Roller How To:

  1.  Section out your bangs and/or the front portion of your hair around your face.  If you don’t you’re going to look a little crazy.
  2. Second take a section at the front of your head, just behind where you have sectioned out your bangs, at the top of your head maybe 1-1 ½ inches wide.  Pull it straight up and comb out any tangles.  You may at this time choose to add a touch of hair spray to the backside of the section, but only if you want to lock in a curl that will stay very TIGHT.  If you are just going for volume skip the hair spray.
  3. Take your first hot roller, be careful not to burn your fingertips as these bad boys get really, REALLY hot.  Slide the curler up from the base of the section of hair from the backside.  This will help smooth any flyaway hairs up into the section.  Once the roller reaches the top of the section, roll it backwards away from your face.  Roll it down until it is sitting on the top of your head vertically.  Do not let it slump towards the back as this will not give you good lift and volume. Apply the clamp.
  4. Work your way back along your crown, repeating this step.

NOTE: If you just desire the top of your head to have volume and don’t want to have big Victoria Secret curls (this isn’t the 2000’s!), just do the crown of your head.  What you want to have is a Mohawk of hot rollers down the very center of your head.  This is going to give you amazing volume to your hair.

  • Once you have rolled the last of the hair in your “Mohawk” let them sit until they are cool to the touch.  Remove them and run your fingers through them.
  • Once removed your hair will have amazing volume along your crown, you can add a little back combing if you want and just style however you like.

And that is Hot Rollers 101!

Method Makeup Academy, Sacramento’s Makeup School

Getting the proper color match

We’ve all done it.  We’ve stood in the cosmetics department of Rite Aid, Walmart, Target, even MAC and Estee Lauder and searched for that right color of foundation.  We’ve even asked for help and still we’ve gotten home to find it’s just not right.

So frustrating, so annoying and so damn expensive!

What is a girl to do? Well, first off, trying to match ourselves in florescent lighting at a Walmart is never easy.  And second most of us are matching the wrong part of our body!

At makeup counters you tend to test foundation colors on your hand.  Big mistake.  Your hands tend to get more exposure to the sun and to the elements than our faces do.  So they are not the same color as our face, or our neck or our décolletage.  So how on earth would the color that matches the back of your hand match your face?  But it’s not like we were ever taught how to really get the right match, right? RIGHT????  So, then we do the time tested holding it up to our cheek test only to get home and find we have become a floating head.  God I hate floating heads!  Or worse we find that nasty line of demarcation.  That thing will kill the best makeup in a heartbeat.

So the answer?

The best place to match your skin is your collarbone, first because your face, chest and neck all tend to be a little bit different from each other.  2nd you won’t be comparing color to sun damage that can develop on your chest.  So if you are matching your collarbone and blending your foundation nicely from your hair line, down your neck and feathering to a finish at your collar bone you will end up, most of the time, with perfectly matched foundation.

One more bit of foundation advice:  The color you use in the winter is not going to be the color you use in the summer, so don’t feel bad about having two colors on hand.  You can use the two either by themselves or by combining them to create your own custom color match, no matter what time of the year it is.

Well I hope this helps.  Have fun out there shopping.

Method Makeup Academy, Sacramento’s Makeup School

Rockin’ Red lips

Hollywood has been rockin’ the red lip and you’ve been dying to follow suit.  But the question remains, how can you rock a hot red mouth and not look like you are crazy made up? 

What about the rules of playing up your eyes and down playing your mouth or vice versa?  Is it true or do you have to do a nude eye with a red mouth?  Your skin is fair, will going red make you look too pale or like a Goth or vamp?  Do you have to do the whole Marilyn Monroe look or Betty Paige?

Well, here’s a few tips to keep you out of the mine field of makeup mistakes and answer a few of those questions.

Generally you will want to play up one feature.  This means if you are doing crazy dramatic eyes you might want to tone down your lips so that your features aren’t at war with each other.

If your lips are very narrow, thin or very small, you might want to avoid the red.  Red is a bold, strong color, it can make thinner lips appear narrow, thus giving your mouth a harder, older look.  For thin lips I would pull out a softer color that will make them look fuller and softer and much more kissable.

Fair skin can rock a red lip, think porcelain doll.  Use a light blush and you will avoid any gothic appearance.

Choose a true red, with a slight cool/bluish undertone, this will be bold and keep your teeth from appearing any color they should not.

For your eyes, you don’t have to opt for the heavy liner of a pin-up or Marilyn, you can do a soft eye, with mascara’d lashes and a soft contour in the crease, or you can be a little more bold and smoke out the liner and lid for a very dramatic evening look. 

Of course the classic Hollywood Glam look is never a bad choice.  You can achieve this with a soft cream on your lid and brow bone, light brown or taupe just in the crease and a dark winged liner.  Heavy mascara and a little liner on the lower lid will give you a fabulous look and help you rock those red lips!

Method Makeup Academy, Sacramento’s Makeup School