All posts by Leah2017

Tattoo Coverage

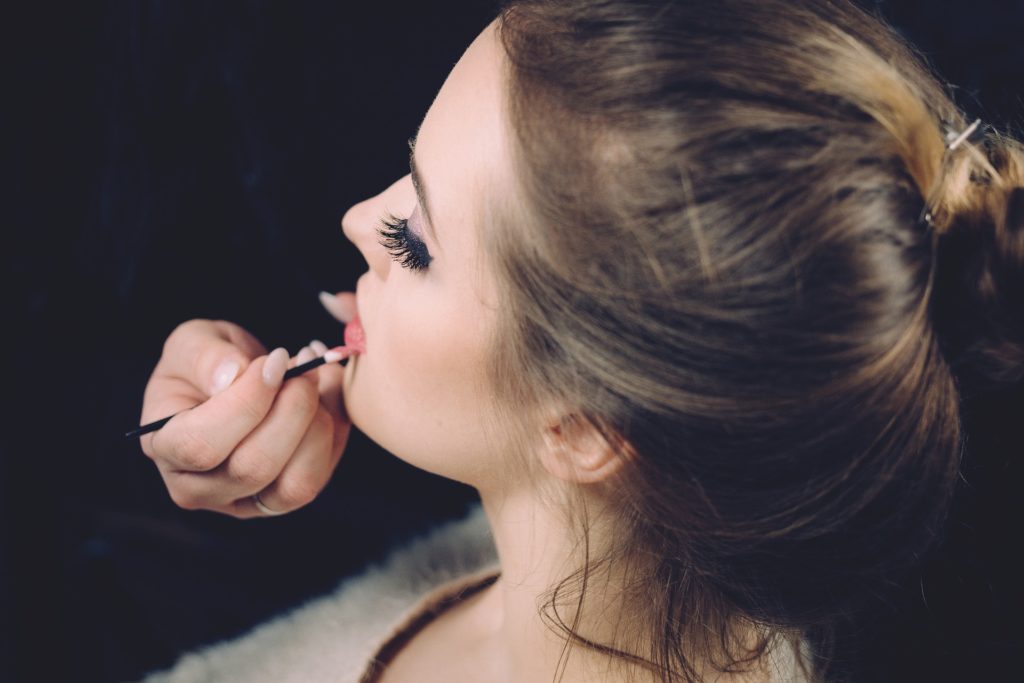
When concealing a tattoo with makeup, it is absolutely crucial to get the right color for your skin. You may need to mix several colors together to get the perfect match. Some makeup actually darkens a bit when it dries, so test the makeup colors wet and dry. The area that you are going to conceal should be clean, dry and free of hair. I use a foundation brush to apply the makeup and blend with my fingers. Apply the makeup over the tattoo and slightly over the edges of the tattoo. Use your fingers or a sponge to blend and feather the edges so they look more natural. You may find that the first coat doesn’t cover the tattoo. You may need to use two or three coats to get the coverage you want.

It is very important to apply thin coats rather than thick ones, and let each coat dry completely before applying the next one. I have found because of the composition of most tattoo cover-up makeup choices out there, drying takes awhile so be patient. After you’re happy with the finished product, you need to set the makeup so that it doesn’t rub off easily. You can use a translucent setting powder made for body makeup, or try a barrier spray like the one made by Mehron.

No makeup is completely transfer proof. You may find that the makeup does rub off onto your clothes. And it may not stay put in chlorinated water for long periods of time. That does not mean that it is not long wearing — it is. You should get hours of coverage after an application of body makeup. When you’re ready to remove your tattoo cover-up makeup, use a good makeup remover designed for taking off body makeup.

Even those of us who love our body art occasionally need or want to cover it up, whether for work purposes, a formal function, or a visit to family who might not approve. If clothing won’t meet your cover-up needs, then it’s time to learn how to artfully apply makeup to disguise your ink.

The Right Product

“Street” foundations and concealers will work to hide under eye circles and small blemishes, but they won’t provide the full and lasting coverage of a specialty product. There are numerous heavy-duty concealers on the market, such as Dermablend or Ben Nye Concealer Palette; these are the same products that TV and film makeup artists use to cover an actor’s tattoos and other permanent marks (such as scars or veins).

Look for a product that is completely opaque, heavy, and creamy, not one of the “liquid-to-powder” foundations. Any product with the phrases “sheer” or “light” in the description will not do the trick for this cover-up job! Most tattoos use a blue-based ink, so a yellow concealer will help to counteract the blue tones. Also, make sure that the concealer matches your skin tone exactly. When applying body makeup, even the slightest variation between the makeup and your skin tone is just as obvious as the tattoo itself. If necessary, purchase several shades and mix to match your skin tone.

You can find specialty tattoo concealers in the cosmetic sections of large department stores. When purchasing in department stores, you have the added bonus of being able to test the product and receive recommendations from the cosmetic consultants. If you cannot find a tattoo concealer in your area, you can always search and order online.

Application

With body makeup, long-lasting coverage is vital. Many cream concealers and foundations will leave traces of makeup on your clothes—or worse, on other people’s clothes! The last thing you want after carefully disguising your tattoo is to have the makeup smudge or disappear, revealing your ink. Practice with your concealer ahead of time to make sure that it lives up to its promises.

For lasting results, you must first begin with clean and dry skin. Cleanse your skin as usual, and then use a toner to wipe away any traces of dirt, oil, and makeup. Rinse the area and pat dry. Next, follow the recommendations on the package of your product. Some products will require several layers, but others promise one-step application.

Use a clean, dry makeup sponge for a smooth application. First, apply the product to the area, then use the sponge to spread the concealer evenly. If you are applying several coats, allow each to dry completely. If possible, you might want to cover all exposed skin in the area for an even look. This works well for a facial or hand tattoo but won’t work as well if you are exposing a lot of skin. If you can’t or don’t want to cover all of your skin, make sure to blend the makeup carefully into the surrounding area.

When you are satisfied with the coverage, dust the area with translucent powder to set the makeup in place (some products come with a powder designed to work with that specific formula). Then, test your makeup job by gently wiping a cotton swab or piece of tissue across the surface, and hopefully, your makeup won’t smudge! Finally, check the coverage in several types of light: if you’ll be in bright light, you’ll need even heavier coverage than in dim lighting.

How to match my skin tone?

There are many products available that will cover up a tattoo; however, if you are in a pinch, you can use everyday cosmetics to conceal tattoos. All you need are a few items from your make-up bag for covering your ink in a hurry. If you have this most personal of artwork on your body in any visible place, it would be a good idea to carry these items with you at all times in case you need them.
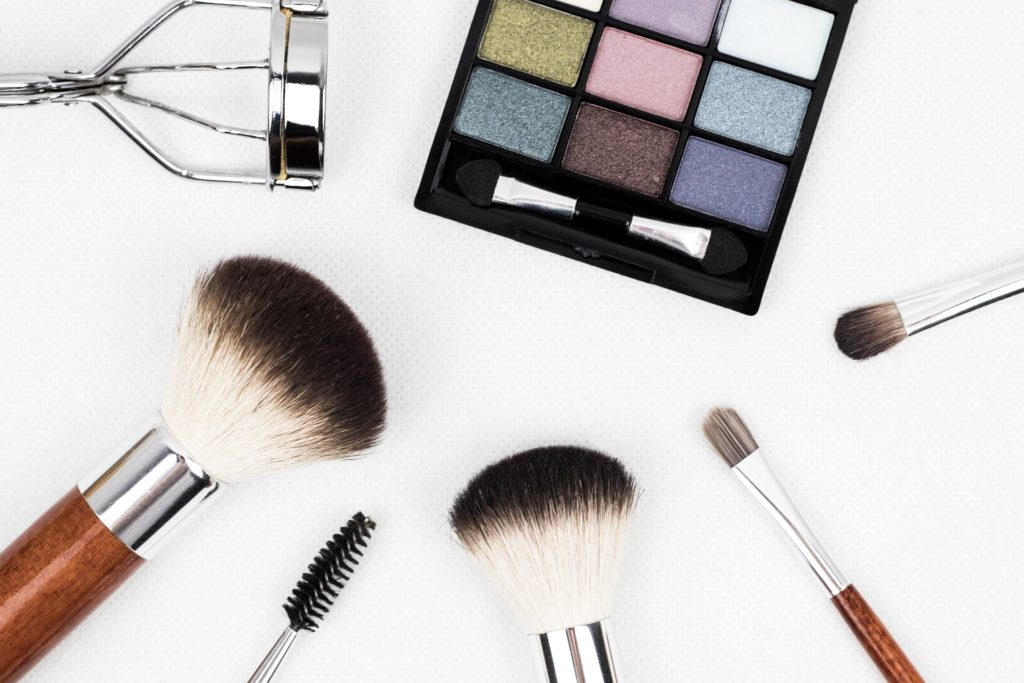
Things you’ll need:

  • Concealer
  • Powder
  • Powder Brush
  • Foundation
  • Eyeshadow or blush that is close to your skin tone
  • Small cosmetic brush

Step 1

Apply concealer. If you happen to have two shades, use them both. Put on the lightest shade first, applying it as you would when covering up the dark circles underneath your eyes. Blend it well into the surrounding area. Repeat this using the darker concealer if you have some.

Step 2

Apply powder on the tattoos. Although a brush will work, a pad is much better. Press the pad firmly into the compact before dabbing evenly and gently across the concealer.

Step 3

Apply foundation. Once again, if you have a darker shade and a lighter one, use both. Put it on as you would on your face, using a light touch, applying the lighter shade first. You can always apply more but, if you put too much on, you’ll have to remove it all and start over with the concealer. Instead of using makeup sponges, as you would when applying theatrical makeup, use your fingertips to blend it in well. This gives you more control and better coverage. Do the same with the darker shade of foundation if you have it before repeating Step 2 and applying powder.

Step 4

Apply eyeshadow or blush. Choose a shade that is close to your skin tone. Use a small cosmetic brush to sweep it over the tattoos, dabbing in areas that seem harder to cover. Put it in light coats, building the coverage and color as needed. Make sure to blend it into the surrounding areas as you go. Repeat step 2 to seal it all in.

Tattoo Cover Up and makeup concealers that really work! Have a Tattoo that needs hiding? Blemishes, birth marks, scars or veins that you don’t want anyone to see? Don’t worry, they won’t see a flaw with our hypoallergenic cover up makeup that is easy to apply.

Brands such as Ben Nye, Mehron, Kryolan Derma Color & Bloody Mary makeup are perfect for concealing tattoos, bruises, stretch marks, blemishes & any number of things. Which ever brand tattoo cover you choose, we suggest you use a neutral set face powder to set the cover up and prevent it from smudging or rubbing off.

Used by makeup artists all over the world, this makeup expertly blends away
temporary and permanent imperfections, including tattoos, birthmarks and blemishes.

It is formulated to be highly pigmented for lasting and seamless coverage.

Method Makeup Academy, Sacramento’s Makeup School

History of Makeup: Ancient Greece

Image by nonbirinonko from Pixabay

To the Greeks and the Romans, physical beauty was sought by both men and women.  And they both subscribed to the ideal of beauty, the fair skin, bright lips and dark eyes.  To achieve this look, the Greeks used vermilion for rouge, as well as the juice from berries to stain their cheeks and lips. They used black incense to darken their lashes and painted their faces with white lead, false eyebrows, made of oxen hair, were also fashionable. In Greece, precious oils, perfumes, cosmetic powders, eye shadows, skin glosses, paints and hair dyes were in universal use. The exportation and sale of these items formed an important part of their trade.

The Romans used wine to stain their cheeks and painted their faces and arms with chalk to get that pallid look. Their lips they stained with red ochre and enhanced their eyes using a mixture of bear fat and lamp soot for eyeliner and mascara.  They used ground saffron on their eye lids for eye shadow. They used crocodile excrement for mud baths (yuck), barley flour and butter for pimples, and sheep fat and blood for nail polish (I think I much prefer today’s cosmetics, don’t you?). The Greeks used vermilion for rouge, as well as the juice from berries to stain their cheeks and lips. Black incense was used to darken the lashes.  Both cultures felt that eyebrows that met above the nose were the most ideal brows a woman or man could have.  Big difference from today!

In both cultures Men and women frequently dyed their hair blonde, but the dyes contained lye and were so caustic that many people lost their hair and had to wear wigs. In Rome, people put barley flour and butter on their pimples and sheep fat and blood on their fingernails for polish. 

With Goddess’ like Venus and Aphrodite, it is small wonder the Greek and Roman woman had such a high ideal of beauty and such a love for the artistry of cosmetics.

Many of the ingredients used during ancient times for cosmetics would be considered dangerous today.  White lead was used in eye shadow, eyeliner, and face foundation. It caused the skin to corrode, would poison the body and eventually lead to death. Many styles and forms of cosmetics were developed throughout the Middle Ages, the Renaissance Period, the Elizabethan Era, the Age of Extravagance (Baroque Period), and the Victorian Age.

Method Makeup Academy, Sacramento’s Makeup School

Step by Step Eye Shadow Looks – Lite Lid/Dark Crease

This look is one of my favorites. It’s great for small eyes, because it makes ANY  eye look larger. It uses the light colors of the lid to give a large doe-eyed appearance. It’s a simple, yet beautiful look.

  1. Base (Lite color across entire lid & up to eyebrow) * This is Step 1 for EVERY Eyeshadow Look.
  2. Apply Medium/Lite color to entire lid, do not bring it into the Crease.
  3. Apply Med/Dark Color into Crease – Pack but do not blend yet.
  4. Using a clean Blending Brush blend out the Med/Dark color in Crease and gently up onto Brow Bone.
  5. Apply Dark Color into Crease – Pack but do not blend yet.
  6. Using a clean blending brush blend out the Dark color in crease and gently up onto Brow Bone.
  7. Optional Step – If needed apply Highlight to inner Tear Duct and at Arch of Eyebrow.

Method Makeup Academy, Sacramento’s Makeup School

History of Makeup – 19th Century

Makeup in the 19th Century

Recommended Movies/Videos:

The use of cosmetics, once widely accepted by all classes, became viewed as vulgar, improper, and acceptable only for actors and prostitutes.  This was a view brought into public opinion by Queen Victoria of England.  Even Adolf Hitler made it clear that the use of cosmetics was not something a proper woman should do.  It was his opinion that face painting was for clowns, not for the women of the Master Race.  This rigid attitude was brought over the Atlantic to North America and women very rarely used cosmetics, at least not so that others would know.  Makeup became light, deceptive, cheek pinching and lip biting were ‘in’ to achieve color where once uses of lipsticks and rouge would have been.

Beauty was supposed to be the reflection of inner goodness, innocence, not artifice.  In America there was a definite distinction made between ‘paint’ and ‘cosmetics’ though the products in these two groups frequently were used to accomplish the same goals.  Cosmetics were used to ‘improve skin’ whereas Paint was to ‘mask’ skin.  Paints were associated with social climbers, prostitutes or those women who would trick a man into marriage.  The upper and middle classes in America also began to associate ‘paint’ with the working or lower class.  The use of paint was an artifice to hide one’s social standing.  In spite of this attitude, women were still quite familiar and adept at a wide variety of home recipes for paints and cosmetics.   Early cosmetics were usually made from home made recipes; some used lead, mercury or arsenic.  Unfortunately the uses of these toxic ingredients lead to illness, and in some cases, death. France developed and manufactured new chemical processes, replacing the natural methods. Zinc oxide became widely used as a facial powder, and is still in use today. Zinc oxide took the place of the deadly arsenic mixture. Zinc oxide becomes widely used as a facial powder, replacing the previously used deadly mixtures of lead and copper. One such mixture, Ceruse, made from white lead, was later discovered to be toxic and blamed for physical problems including facial tremors, muscle paralysis. Eye shadows and lip reddeners contained poisonous substances such as lead, antimony sulfide, and mercuric sulfide.

Belladonna, or deadly nightshade, was used to make one’s eyes sparkle. It was a deadly poison when used in large amounts. Women still used cosmetics, though they hid their uses carefully.  They used beeswax on their lashes to make them appear thicker, used kohl on their lashes to darken them.  For eyeliner women used burnt matches, when they cooled, they applied the ash to their lids.

Method Makeup Academy, Sacramento’s Makeup School

CLEAN BRUSH RECIPE

It is so important to keep your brushes clean. Dirty brushes can make your makeup application muddy, can cause your brushes to age prematurely and most concerning cause skin irritation. Which is why it is so important to clean your brushes properly. I try to do a nice deep clean for my brushes at least once a month.

Personally find that good old fashion Dawn Dish Soap, the Anti-bacterial one, NOT the Bleach One, is the best brush cleaner.  It’s gentle on the brushes, doesn’t damage them, and breaks down the oils that build up in them and best of all its cheap!  So, if you want to go that route, here’s a quick recipe for deep cleaning your brushes with Dawn Dish Soap (Not all dish soap works as well, but you can use other brands in a pinch).

  • Put a half inch of scalding hot water in the bottom of a small cup.
  • Squeeze in a small squirt of Dawn dish soap, swirl it and the water together.
  • Place in all brushes, making sure that the water doesn’t come up too high on the actual wood of the brush.
  • Allow to soak for no more than 10 minutes.  If you soak too long the water can absorb up into the wooden handles which can cause them to expand.  Once they are expanded and start to dry they can constrict and crack.
  • After they have soaked, swirl the brushes in your palm to scrub out the makeup.
  • Rinse well in scalding hot water.
  • Squeeze the water out of the brush, shape them into their proper shape and lay out on a towel to air dry.
  • Allow to dry overnight.

And there you have it!

Method Makeup Academy, Sacramento’s Makeup School

Instructions: Full Cut Crease

For those of you who have always wanted to do that perfect Cut Crease, here are some step by step instructions:

Full Cut Crease

  1. Base (Lite color across entire lid & up to eyebrow) * This is Step 1 for EVERY Eyeshadow Look.
  2. Blend a Med/Dark color up into crease and softly onto brow bone.
  3. Apply dark color into crease and blend up into the Med/Dark brown to soft, leaving most of the dark in the deepest part of the crease.
  4. Cut your crease on lid according to the shape of their eye with concealer or eye primer
  5. Pack lite/Med color of choice(or shimmer or glitter) onto the eye lid.

Optional Step – If needed apply Highlight to inner Tear Duct and at Arch of Eyebrow.

Method Makeup Academy, Sacramento’s Makeup School

10 Ancient Beauty Habits

  1. In ancient Babylon, unwanted facial hair was sanded off with a rough pumice stone.
  2. Women in Edwardian England swallowed tapeworms to keep themselves slim and trim. The parasite would digest most of the food the women ate, helping them maintain a slender appearance, but it also destroyed their health.
  3. Beautiful blonde highlights in the hair were achieved by Venetian ladies by pouring lion urine on their tresses before sitting out in the sun. (Now I’ve used lemon juice under sunlight, but lion urine?  I think that’s a tad extreme.
  4. Early Japanese geishas and Kabuki actors used nightingale droppings to remove the thick make-up from their faces.
  5. Roman ladies rubbed brown seaweed on their faces as rouge, which did them no harm. But the white powder made from lead they rubbed on their faces gave them a slow death by lead poisoning as surely as it delighted their admirers.
  6. Italian ladies of the past used to apply deadly nightshade to enhance their eyes. The poison dilates the pupils and makes people’s peepers look enormous and glowing.
  7. Arabian ladies loved sleek and shiny hair, so they used camel urine to dip their raven-black hair in.
  8. In the England of Queen Elizabeth I, great beauties of the time owed the rich red color of their lips to bugs. The squashed remains of insects were rubbed on the mouth for a ruby-red luster. (We still use the red from bugs in food and cosmetics.  Don’t believe me?  Look for cochineal, carmine, or carminic acid in your food, it’s made from the ground up bodies of the female Dactylopius coccus bug.)
  9. Face painting with white lead powder was also popular in Elizabeth’s time. The beauty secret caused the premature demise of a number of 16th century lovelies.
  10. Crocodile dung made into a paste with donkey’s milk kept Cleopatra’s skin looking lovely in the Egyptian heat. She used it as a face mask – when Caesar wasn’t around.

Method Makeup Academy, Sacramento’s Makeup School

History of Makeup: Israel

When we think of makeup we don’t usually think of the Bible for fashion tips! Seriously that’s not the first thing that pops into my mind.  However, makeup has been widely used by men and women for thousands of years and in ancient Israel makeup was used for adornment as well as medicinal purposes. 

Israel was a nation amid nations, standing apart from the cultures that surrounded them, being relatively nomadic during their earliest history, and being the birthplace of one of the first monotheistic religions in the world.

While they stood apart in many ways, they were however much influenced by the cultures around them and much of their fashion was derived through assimilation.

One of the sources of information we have on the ancient practices of the Israelites comes from the Talmud, the central text of Rabbinic Judaism.  It mentions the uses of dyes of blue-black (kalal) for the eyes.  “These are permitted in woman’s adornments: she treats her eyes with kohl.” (Talmud, Babylonian. Moed Kattan 9b).

Like in other cultures of the day, kohl had more than cosmetic purposes, also being used for healing purposes, it was believed to restore poor eyesight and reduce eye infection.  With the use of mirrors made of highly polished silver and copper and small sticks, ancient Israeli women lined their eyes and eyebrows heavily with kohl.  The upper and lower eyelids were painted in a line that extended past the ends of the eye, creating a more almond shape. Aside from being cosmetically appealing the kohl also worked to repel irritating insects that could transmit eye irritation and inflammation. Many of the uses of cosmetics were strictly codified by the laws of the Talmud, one of which was the uses of kohl.  It was forbidden on the Sabbath, as it was considered a form of work much like cooking and other daily chores.

They used many other items other than kohl, such as rouge called sarak, violet for shadows called pikas, white to lighten their faces and other colors to tint their hair and nails, all of which are mentioned in the Talmud.  They also used an evening mask to remove blemishes. It was made from flour mixed with fragrant spices.  It was worn all night and washed away in the morning with milk.

The Talmud urged cleanliness and one was supposed to wash their hands each morning and evening before prayer.  Women and men took great pains in their cleanliness, washing daily in rivers or from basins of water and using oils and cleansing creams made from animal or vegetable oil mixed with powdered lime and perfume which worked as soap.   Another item pertaining to Biblical hygiene required that adults remove all body hair from the underarms, arms, legs and pubic area.

Teeth and breath were freshened by chewing on pellets made of ground tamarisk leaves. Although there is no evidence of toothbrushes or toothpaste it was known that people washed or wiped their teeth with cloths, cleaned between their teeth with cedar toothpicks and rinsed their mouths with salt water.

Head hair on both men and women was given great importance, shaven heads and beards were a sign of great disgrace and dishonor.  Long hair was a mark of beauty, worn by men and women alike.  The women of Israel kept their hair skillfully braided, in tight cornrows and they even used wigs and extensions to give themselves the thick hair they desired.  Hair was only worn down by women on their wedding day as a sign of their purity. 

Since the beginning of time makeup and fashion has found its place in every culture, religion and practice, Israel was no different.

Method Makeup Academy, Sacramento’s Makeup School

Long Hair Tips

Having a hard time getting your hair to grow? These 4 Tips are sure to help:

  1. Have a Good Balanced Diet. Meaning eat those veggies!
  2. Stay Hydrated! Drink at least 32oz of H20 each day.
  3. Condition your hair with Virgin Coconut Oil. I know that seems crazy, but it works.  Coconut is amazing, protein rich and will stimulate thicker hair growth. I recommend running some coconut oil lightly through your hair before bed, braiding it nice and secure and going to sleep. The next day, wash and condition as usual.  It will make a BIG difference.

And Last but NOT Least:

4. Take your Supplements. We all know Vitamins are essential for health, but did you know that Biotin actually makes hair and nails grow stronger and longer? So Add Biotin and Vitamins H & B7 to your diet to get long luscious locks!

And there you have it; four helpful tips to get those luscious locks to grow!

Method Makeup Academy, Sacramento’s Makeup School

We’re talking beards!

Got to send out a little love to the boys and what’s better than to talk about: Full beards, five o’clock shadow and Fu Manchu’s, that’s right, I am talking facial hair!

What’s in, what’s out and what a woman wants, can sometimes be one and the same.  Some women totally dig a man with a full manly beard, while others can’t stand even a thin mustache.  It’s a lot about preference, but seriously, it’s YOUR face.  And what you like should matter most.  However, there ARE some simple do’s and don’ts.

Do: Groom.  That means, trim, clean, shape, whatever facial hair design you got growing.

Don’t: Grow a beard if you don’t have enough hair to pull it off.  Seriously, if it’s a straggly mess you’re just going to look like a kid in puberty.

Do: Change it up.  Change your style sometimes, pay attention to what’s in, but don’t obsess.  If you like a full beard with red or blue tips, go for it.  But stay aware of what’s out there.  You don’t want to date yourself or get too stuck.  Change is good.

Do: Use the proper tools.  Use real scissors, not the kiddie plastic handle paper scissors you found lying around.  The right tools will make grooming and maintenance much easier.

Don’t: Trim your beard or mustache when it’s wet.  When your hair is wet the strands appear longer and if you trim at that time you’ll end up with stubby facial hair.  So trim when it’s dry so you can see how it’s really going to look.

Do: Use good product on your facial hair.  Use a good shampoo and even a conditioner.  It will keep the hairs from drying out, from breaking and will make it softer against a lady’s face. Beard Oils are a thing, a MUST. I suggest checking out the BadAss Beard Care. These Guys know beards!

Do: Seek professional help!  That’s right, utilize the skills of a professional Barber. He knows what he’s doing and he will hook you up right! Also it’s a real treat to let yourself be pampered every once and a while. 

So what’s in right now?  A smooth clean face is always nice when kissing, however a little roughness, some stubble gives a guy a sexy edge.  And you know how girl’s like their bad boys.

Goatee’s are always in, different shapes, with or without an attached or even unattached mustache.  Side burns, beards, different colors, it’s all up to you.  What’s in seems to be personal expression.  So try it out, experiment and find what fits you.

Method Makeup Academy, Sacramento’s Makeup School